Proper Tattooing Procedure
(aka "The 411 on How It's Done")
Preparation

So the day of your tattooing procedure has finally arrived – you've worked out all of your tattoo design ideas with the artist and came up with a final design, its size and positioning on your body, and you have been quoted a price or given an estimate (if they are charging by the hour).
YOU are finally getting your tattoo...NICE!
Hopefully, you:
- Got a good night's sleep;
- Didn't get into a drinking contest (best if you didn't drink for at least 12 hours before);
- Are fed and well-hydrated;
- Made sure you are clean AND that you don’t have any skin issues (to include sunburn) in the area that will be getting the ink.
Now, make sure you check the design one final time. Remember, this is something you very well may be wearing on your body for the rest of your life…it’s perfectly okay to be real picky right now!
A Germ-Free Tattooing Procedure, Please!
Once your tattoo artist has got the stencil EXACTLY RIGHT (I can't stress this enough!) and has made you comfortable as possible in his/her tattoo chair, bench or table, it’s time to get down to business! Let the fun (tattooing procedure) begin!
The artist will now, shave and disinfect the area to be tattooed...then apply the stencil (outline). Again, MAKE SURE that it gets positioned EXACTLY where you want it to be before the tattooing procedure begins. It is not unusual at all to have the stencil cleaned off and reapplied multiple times (my first time, I had the artist do it over four times!).
When the two of you are finally ready to get down to the indelible business at hand, GET YOURSELF COMFY...you'll be there for a while!

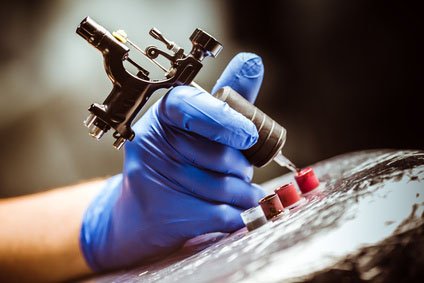
Remember, a tattoo machine creates puncture wounds (thousands, actually) in order to inject the drops of ink into the skin. Since any puncture wound has a potential for infection and even transmission of germs and diseases, a great deal of this process will focus on safety and sterilization.
Your tattoo artist should go over these tattoo supplies, tools and all tattooing procedures with you before he/she gets to the inking. If they miss any of the following, ask about them!
· Single-Use Materials: Inks, ink cups, gloves and needles. These should arrive in sealed packaging. After use, they must be properly disposed of after your procedure.
· Sterilized Reusable Materials: Needle bar and tube, which are sterilized before each use. The ONLY acceptable sterilization method for this is done by an autoclave.
· Spore Tested Autoclave: While the autoclaves ensure sterility of tools and materials, spore tests ensure the sterility of the autoclave itself. These should be done every 40 hours of autoclave use (in Florida, but varies by state) and should be logged with time and date.
· Bio-hazard Containers: These should be available for single-use materials and objects that have come into contact with blood or bodily fluids - to include used needles.
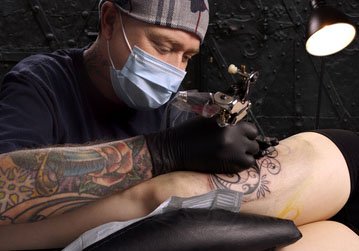
· Proper Artist Tattooing Procedure List: Your artist must wash and inspect his/her hands thoroughly, then should do the following:
o Explain the sterilization process to you;
o Disinfect the work area (with an EPA-approved virucide);
o Open Single-use materials in front of you;
o Use fresh ink for each session (loaded into disposable ink caps);
o Wash hands and don fresh disposable gloves with every new stage of the process or after any breaks.
Bottom Line on Germs

Don’t worry about seeming nosy or overly suspicious about cleanliness or proper tattooing procedures! Any tattooist worth his/her salt will more than understand your concerns (and should in fact share them).
If you are not satisfied, or if the tattoo artist gives you an attitude about any of this, WALK AWAY (but pay them anything you owe for their time, of course).
Hey, there are plenty of great AND clean tattoo shops out there with straight-up artists that deserve your business!
"What is the actual PROCESS?"
Here is what happens during and after your tattooing procedure:
· Using an electromagnetic "Tattoo Gun" (aka "Tattoo Machine) the ink is being injected by several electrically powered “needles” into the skin’s dermis – the layer of tissue that lies beneath the epidermis.
· Once the ink containing the pigment is injected, the body’s immune system is alerted and it sends phagocytes to surround the foreign matter.
· The area is now a large scab that should be constantly moisturized and covered for at least a few days until the slight bleeding stops.
· As the countless puncture wounds begin to heal, the damaged outer epidermis is shed along with the surface pigment.
· A granulation tissue forms in the deeper dermis where collagen grows to make actual connective tissue.
· The upper portion of the dermis layer begins healing, where the ink/pigment remains trapped within fibroblasts.
· The pigment then becomes concentrated just below the boundary between the dermis and epidermis.
· Within a few short days, your skin will heal and you'll be the PROUD BEARER of some very cool ink! Take good care of it, and it will look great from many years.
FACT: Most tattooing inks consist of water, glycerin, alcohol and pigments. Pigments usually consist of natural materials, such as finely ground up carbon and stone.
"Why do old tattoos look like crap?"

Although your tattoo will remain stable for some time – just tucked in between those layers – over several years (how many depends on certain factors like regular moisturizing, sun exposure, etc) the pigment will absorb deeper – which accounts for the spreading and fading of older tattoos. When that starts to happen, maybe it’s time to revisit your favorite tattoo shop for a refresh…or maybe decide to change the design completely with a cover? (Not necessary if you chose wisely in the first place, of course).
Hey Tattoo Fans!
If this feels like your kind of place, why not bookmark my Home Page and come back for a visit again soon?
Also, links to my new or updated pages are always included in the Blog Page... come on over to Getting a Tattoo - So What's New?
Social Media and RSS users, see below!

New! Comments:
Like what you've seen on this site? Got a tattoo experience of your own you'd like to share? Questions? Leave a comment in the box below...don't be shy!